The Kitchen Cabinet Process
The Four Key Phases of The Process
-
Confirm on color and sheen.
-
Refinish the cabinet boxes/structure onsite.
-
Refinish cabinet doors and drawers at the shop.
-
Reinstall and align cabinets.
How long does it take?
Cabinet doors and drawers need a 5 to 12 day turnaround time at our shop.
Refinishing the cabinet boxes onsite takes 2 to 3 days for average size kitchens (that have 22 to 39 cabinet doors).
How our Clients Prepare for the Service
Before we come onsite for the onsite spray-painting please remove all furniture from the area. Ensure that your floors are clean. Please clear-out the countertops and fully empty-out your cabinets. Please clean in behind your refrigerator and stove (if applicable)
THE PAINT FINISHER PROPRIETARY CABINET PROCESS
How We Start The Cabinet Refinishing Process
Bring in required tools and kindly perform the work with care. Try not to strip any screws.
-
Put up yard sign if applicable
-
Get before pictures
-
Number tap
-
Stick on numbered tape
-
Remove glass from cabinet doors as necessary and store onsite
-
Remove handles/knobs and place them in designated Ziplock bag
-
Remove doors/drawers, number them and place screws in designated Ziplock bag
-
Lean removed doors mindfully, securely and respectfully
-
Punch-in and remove exposed staples/nails
-
Remove hinges from cabinet boxes that are to be painted and place them in designated Ziplock bag
-
Load cabinets into truck
The Shop Process for (non-porous material) Maple and MDF Cabinets
BONDO Unutilized hardware holes, hinge holes & if required big damage.
BOTH-SIDES - Remove bumpers, adhesive and get-rid of grease and gunk
-
Scrub clean
-
Dry-off
-
Ensure that greases and adhesives are gone
-
BOTH-SIDES - Patch fissures & evident gauges that are not superficial enough to sand-out. Sand unevenness (e.g., level out damaged finish)
-
FRONT-SIDE - Perform caulking if applicable to project
-
BACK-SIDE - Spray primer
-
FRONT-SIDE- Spray primer and sand
-
FRONT-SIDE- Prime again if applicable
-
FRONT-SIDE - Caulking if applicable to project
-
BACK-SIDE - Final sand with 320-400 grit.
-
BACK-SIDE - Top-coat
-
FRONT-SIDE - Prep
-
FRONT-SIDE - Ensure surface is ready for its final top-coat & perform final 400grit sand
-
FRONT-SIDE - Perform final top-coat
-
PAINT FINSINHER Quality Inspection Criteria:
-
The color is correct without any apparent contamination in the finish
-
Full paint-coverage
-
The sheen is consistent without dry-spots
-
No bubbled or cracked finish
-
No bleed-throughs
-
No bulging specs
-
No drips/runs or evident sagging of paint
-
The finish looks smooth and feels smooth to the touch
-
-
Package in bundles (30lb MAX) and load
The Onsite Process
-
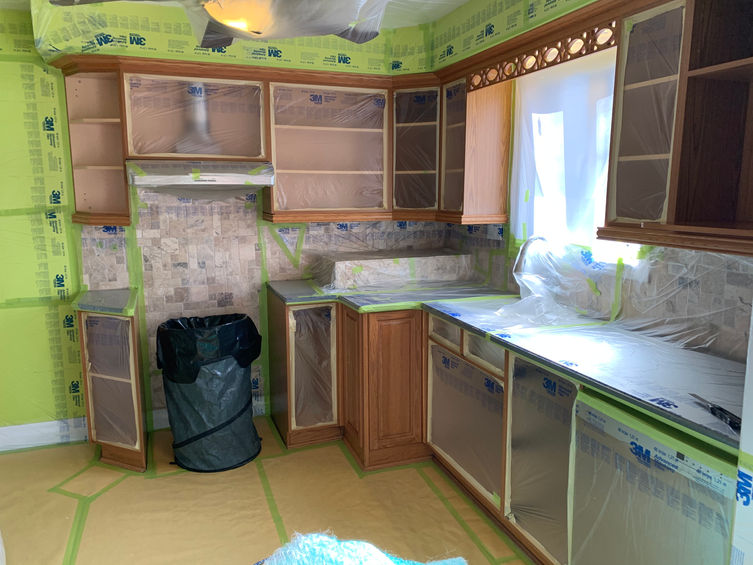
Laydown paper from entrance to cabinetry if applicable
-
Pullout mobile appliances if applicable
-
Bring in equipment
-
Unclipping/remove hinges
-
Remove drawer boxes as needed
-
Remove cover plates where applicable
-
Scrape-off & or cutout any silicon where applicable
-
Remove adhesive. Sand non-greasy cabinetry instead of the 4 bulletined steps below
-
Scrub with soapy water until grease & gunk is dissolved & dry off naturally or manually
-
Ensure adhesives of any kind have been dissolved
-
Ensure that the surfaces are clean of grease. If not, scrub again until clean.
-
Finally wipe with fresh water especially where masking tape will be adhered (i.e., floor around toe-kick, edge of appliances & interior perimeter of cabinet boxes).
-
Perform patch work and caulk significantly open creases where applicable
-
Tape-off
-
Floor
-
Countertops and Backsplash
-
Interior of Cabinet Boxes where applicable
-
Walls and Ceilings if applicable
-
Appliances and Furniture
-
Enclose spray room & create entranceway
Ensure spray-room is warm prior to spray application & especially after spraying while the finish is drying preferably 24C° and up & never dipping below 20C° during the spray application.
-
Set-up air-extractor & open air inlet window or door
-
Sand patches and uneven surfaces with required PPE
-
Complete caulking
-
Ensure spray-room is clean and ready for spray application
-
Spray-room is free of dust and debris
-
Cover or move tools from overspray range
-
Everything within 4’ of spray application is covered properly
-
Picture/video
-
Spray white or tinted primer (PPE). Back-roll oakwood if needed (PPE)
-
Prime again if not near full-coverage (PPE). Fill porous wood grain with more primer (PPE)
-
Do necessary caulking & filling of imperfections before top-coats
-
Spray first top-coat (PPE)
-
Check for caulking & imperfections that need filling
-
Plain runs & sags with utility blade. Fine sand throughout (PPE)
-
Tacc off dust and spray final top-coat (PPE)
-
PAINT FINISHER Quality Inspection Criteria:
-
No apparent contamination in the finish
-
The color is correct
-
We have full paint-coverage
-
The sheen is consistent without dry-spots
-
No bubbled or crackled finish
-
No bleed-throughs
-
No bulging specs
-
No drips/runs or evident sagging of paint
-
Gable-ends, valance and everything finished within an arm’s reach is smooth
-
Remove the masking material mindfully
-
Remove overspray with methyl hydrate where applicable (PPE)
-
Touchup walls, trim or ceilings that we’ve damaged with the customers touch-up paint if applicable
-
Put-up hinges
-
Perform installation of cabinets & hardware
-
Stick-on bumpers
-
Replace broken hinges if applicable
-
Align cabinets
-
Check for inconsistent crease openings
-
Remove numbered tape
-
Sweep-up/cleanup
-
Is there anything else that you can reasonably do to make your customer happier?
-
Did you maximize the beauty of this project?
-
Give gift now or when more appropriate
-
Get after pictures, ask for video testimonial and online review


